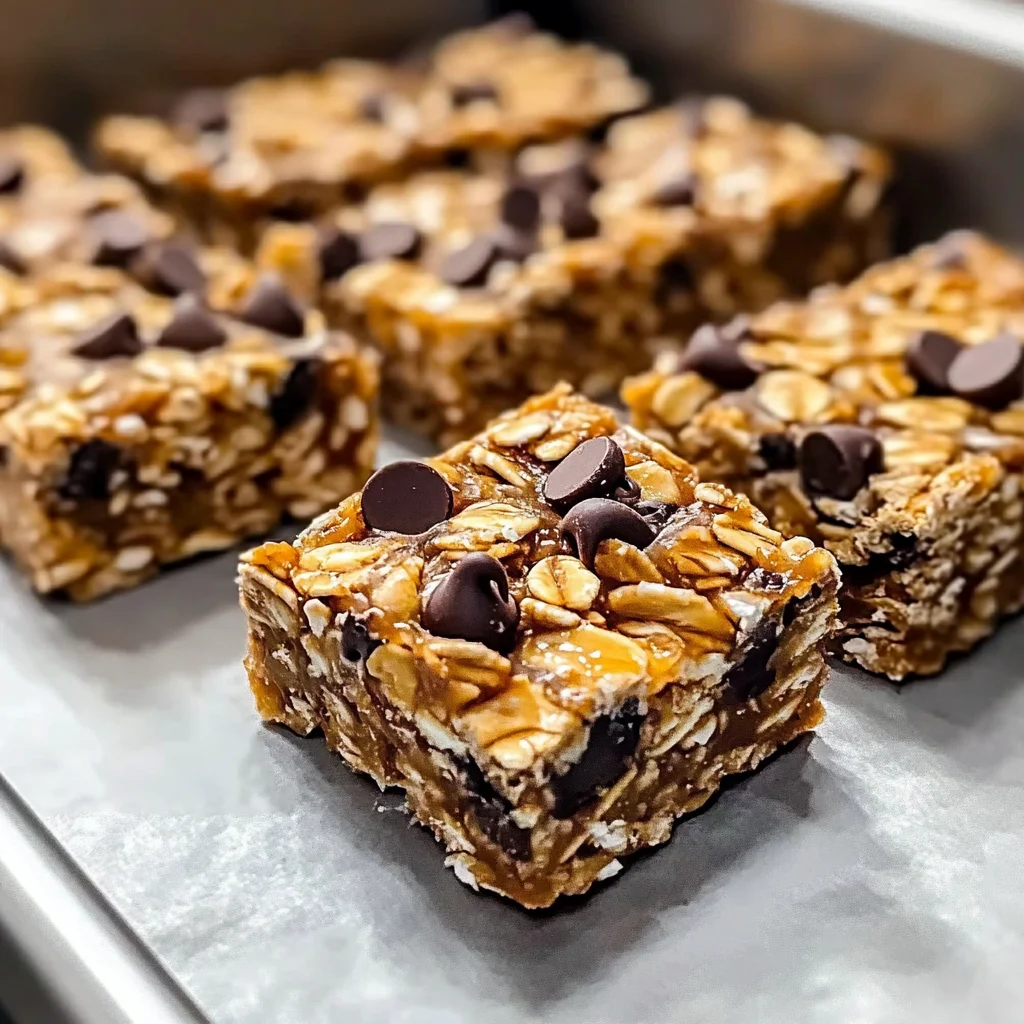
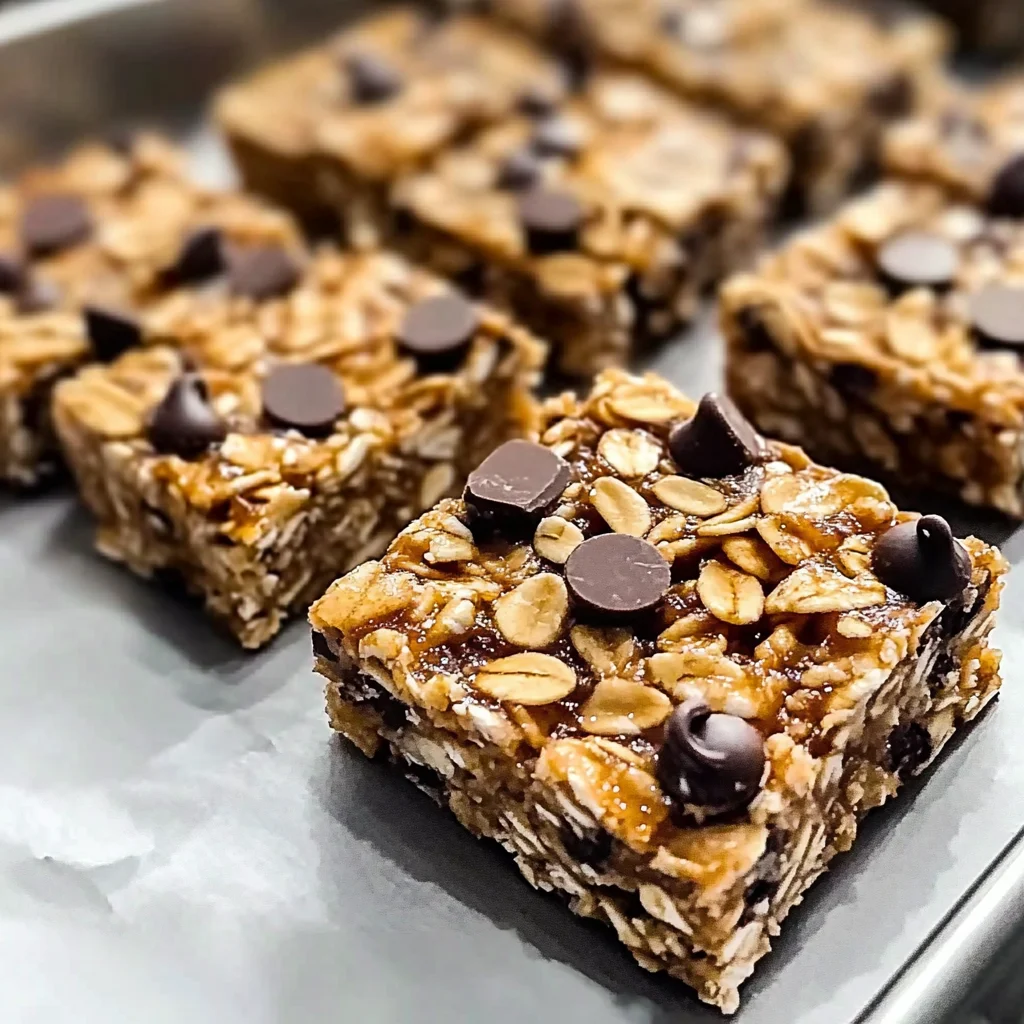
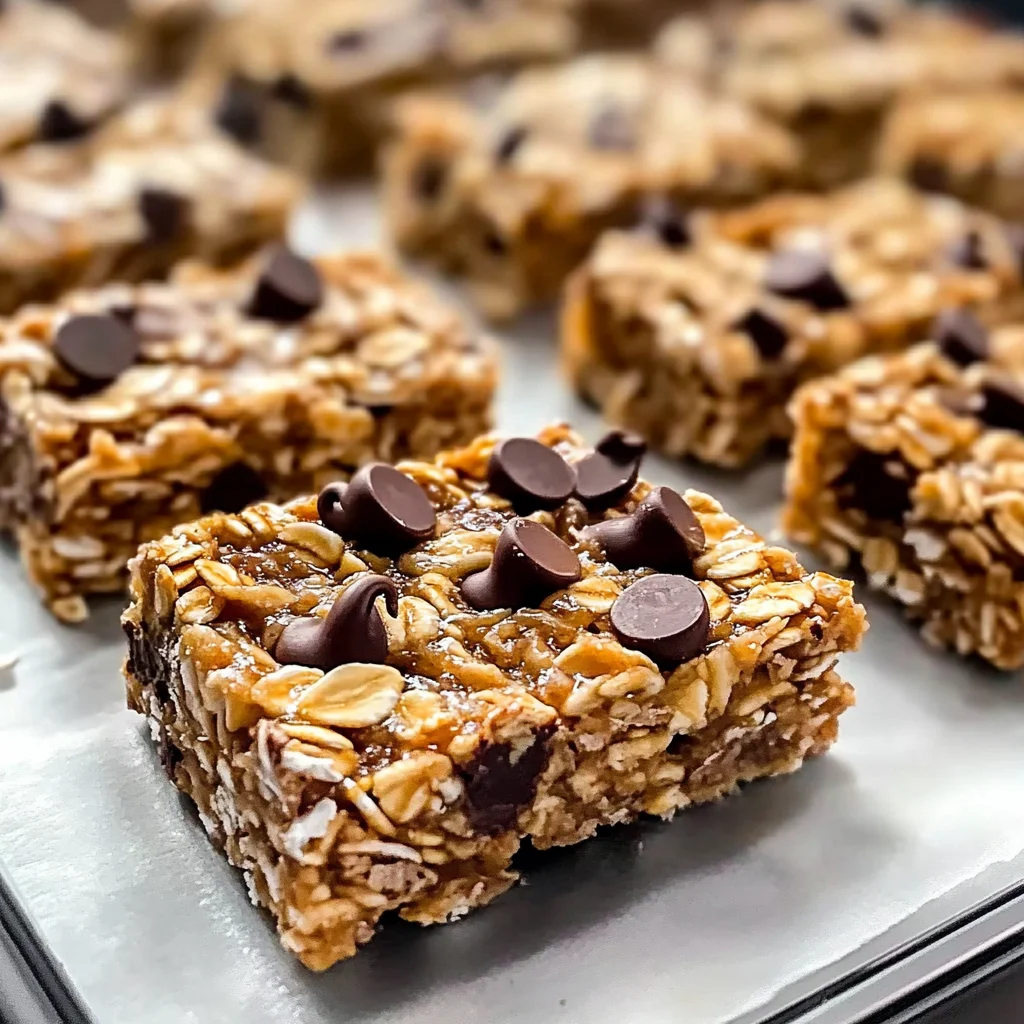
Homemade no bake granola bars are the perfect solution for a quick snack that everyone can enjoy. These bars are not only easy to make but also customizable, allowing you to mix and match your favorite ingredients. Whether you need a breakfast on-the-go, a post-workout boost, or a sweet treat for your afternoon slump, these granola bars fit the bill. With simple components like oats, nut butter, and honey, you can whip up a batch of deliciousness in no time!
Why You’ll Love This Recipe
- Quick Preparation: You can have these homemade no bake granola bars ready in just 10 minutes of prep time!
- Customizable Ingredients: Adjust the mix-ins to suit your tastes—think chocolate chips, nuts, or dried fruit!
- Healthy Snack Option: Packed with nutrients from oats and nut butter, these bars are a wholesome choice.
- No Baking Required: Just mix, press, chill, and enjoy—no oven needed!
- Perfect for Meal Prep: Make a big batch and store them for snacks throughout the week.
Tools and Preparation
To make your homemade no bake granola bars efficiently, having the right tools is essential. These tools will help streamline the process and ensure perfect results every time.
Essential Tools and Equipment
- Mixing bowl
- Parchment paper
- 8×8-inch baking dish
- Small saucepan
- Spoon or spatula
Importance of Each Tool
- Mixing bowl: A large bowl allows for easy mixing of dry ingredients without spilling.
- Parchment paper: This helps with easy removal of the bars from the baking dish after they set.
- 8×8-inch baking dish: The perfect size for making uniform granola bars that are easy to cut.
- Small saucepan: Ideal for melting nut butter and honey together smoothly.
Ingredients
For the Base
- 2 cups old-fashioned rolled oats
- 1/2 cup nut butter (peanut butter, almond butter, or cashew butter)
- 1/3 cup honey (maple syrup or agave)
For Mix-Ins
- 1/2 cup mix-ins (chocolate chips, dried fruit, seeds, or nuts)
Flavor Enhancers
- 1 teaspoon vanilla extract (optional)
- Pinch of salt
How to Make Homemade No Bake Granola Bars
Step 1: Prepare Your Pan
Line an 8×8-inch baking dish with parchment paper. Leave some extra hanging over the sides to help lift out the bars later.
Step 2: Mix Dry Ingredients
In a large bowl, combine the 2 cups of oats with your 1/2 cup of mix-ins. You can choose from chocolate chips, dried fruits, or nuts based on your preference.
Step 3: Heat Wet Ingredients
In a small saucepan over low heat, melt together the 1/2 cup of nut butter and 1/3 cup of honey (or maple syrup/agave). Stir continuously until smooth. If you’re using it, add in the 1 teaspoon of vanilla extract along with a pinch of salt, stirring well.
Step 4: Combine Wet and Dry Ingredients
Pour the melted nut butter mixture over the combined oat mixture. Stir until all oats are well coated.
Step 5: Press into the Pan
Transfer this mixture into your prepared baking dish. Use the back of a spoon or spatula to firmly press it down evenly so it holds together well.
Step 6: Chill
Place your pan in the refrigerator. Allow it to chill for at least 2 hours or until firm enough to cut into bars.
Step 7: Slice and Serve
Once set, lift out the granola mixture using parchment paper. Cut into 10-12 bars. Enjoy immediately or store them in an airtight container for later!
How to Serve Homemade No Bake Granola Bars
Homemade no-bake granola bars are versatile and can be enjoyed in various ways. Here are some serving suggestions to enhance your snacking experience.
As a Breakfast Option
- Pair with yogurt: Crumble the bars over a bowl of yogurt for added texture and flavor.
- Enjoy with fresh fruit: Serve alongside seasonal fruits like berries or banana slices for a nutritious start to your day.
With a Dip
- Nut butter spread: Dip the bars into extra nut butter for a protein boost.
- Fruit preserves: A dollop of your favorite fruit jam adds sweetness and complements the granola flavors.
On-the-Go Snack
- Pack in lunchboxes: These bars are perfect for school or work lunches, providing energy throughout the day.
- Take on hikes: They make an excellent portable snack when you’re out exploring.
For Dessert
- Drizzle with chocolate: Melt some dark chocolate and drizzle it over the bars for a sweet treat.
- Serve with ice cream: Crumble the bars over vanilla or dairy-free ice cream for a delightful dessert.
How to Perfect Homemade No Bake Granola Bars
To ensure your homemade no-bake granola bars come out perfectly every time, follow these helpful tips.
- Use fresh ingredients: Ensure that your oats and mix-ins are fresh to enhance flavor and texture.
- Customize mix-ins: Experiment with different nuts, seeds, or dried fruits to find your favorite combination.
- Press firmly: Make sure to pack the mixture tightly in the pan; this helps the bars hold together once chilled.
- Chill adequately: Allow enough time in the refrigerator for the bars to firm up before cutting; at least 2 hours is recommended.
- Store properly: Keep them in an airtight container in the fridge for longer-lasting freshness.
Best Side Dishes for Homemade No Bake Granola Bars
Serving side dishes with your homemade no-bake granola bars can elevate your snack time. Here are some great pairings:
- Greek Yogurt – Creamy and packed with protein, it’s a perfect complement to crunchy granola bars.
- Fresh Fruit Salad – A refreshing mix of seasonal fruits adds natural sweetness and vitamins.
- Trail Mix – A combination of nuts, seeds, and dried fruits offers extra crunch and flavor alongside your bars.
- Vegetable Sticks – Carrot, cucumber, or bell pepper sticks provide a healthy crunch that balances out sweetness.
- Cheese Cubes – Pairing cheese with granola can create an interesting sweet-salty contrast that delights the palate.
- Smoothie – A fruity smoothie can be a refreshing drink option that pairs well with the chewy texture of granola bars.
Common Mistakes to Avoid
Making homemade no-bake granola bars is simple, but some common mistakes can affect the final result. Here are some tips to guide you.
- Skipping the chilling time: Not allowing the bars to chill long enough makes them difficult to cut. Always refrigerate for at least 2 hours to ensure they set properly.
- Overpacking the mixture: Pressing the mixture too hard can make the bars dense and tough. Gently press down to keep them chewy and enjoyable.
- Ignoring mix-ins balance: Adding too many mix-ins can disrupt the binding of ingredients. Keep a balanced ratio of oats to mix-ins for optimal texture.
- Using too much nut butter: Excess nut butter can make your bars greasy. Stick to the recommended amount for a perfect consistency.
- Choosing the wrong sweeteners: Not all sweeteners work equally well in no-bake recipes. Stick with honey, maple syrup, or agave as they bind better than granulated sugar.
Storage & Reheating Instructions
Refrigerator Storage
- Store your homemade no-bake granola bars in an airtight container for up to one week.
- Layer parchment paper between bars if stacking to prevent sticking.
Freezing Homemade No Bake Granola Bars
- Wrap each bar individually in plastic wrap before placing them in a freezer-safe bag.
- They can be frozen for up to three months.
Reheating Homemade No Bake Granola Bars
- Oven: Preheat to 350°F (175°C) and warm bars for about 5 minutes. This will refresh their texture.
- Microwave: Heat on low power for about 15-20 seconds per bar, checking frequently.
- Stovetop: Place in a pan over low heat just until warmed through, ensuring they don’t melt.
Frequently Asked Questions
If you have questions about making homemade no-bake granola bars, you’re not alone. Here are some common inquiries.
Can I customize my Homemade No Bake Granola Bars?
Absolutely! You can add nuts, seeds, or dried fruits based on your preferences. Stay within the ingredient ratios for best results.
How do I know when my Homemade No Bake Granola Bars are ready?
The bars should feel firm when chilled. If they hold together without crumbling, they are ready to slice and enjoy!
What are some good mix-ins for Homemade No Bake Granola Bars?
Great options include chocolate chips, dried cranberries, sunflower seeds, or chopped nuts. Choose what you love!
Can I use different nut butters in my recipe?
Yes! Almond butter and cashew butter work beautifully as alternatives to peanut butter. Just ensure that they’re creamy for easy mixing.
How long do Homemade No Bake Granola Bars last?
When stored properly in an airtight container, they last up to one week in the refrigerator and three months in the freezer.
Final Thoughts
Homemade no-bake granola bars are a delicious and versatile snack option that you can easily customize with your favorite ingredients. Whether you prefer sweet chocolate chips or crunchy nuts, these bars cater to all tastes. Try this recipe today and enjoy a healthy treat anytime!

Homemade No Bake Granola Bars
- Total Time: 0 hours
- Yield: Approximately 12 servings 1x
Description
Homemade no-bake granola bars are the ultimate convenient snack, perfect for busy lifestyles. Made with wholesome ingredients like oats and nut butter, these chewy bars are not only easy to prepare but also customizable to suit any taste. In just a few simple steps, you can create a delicious treat that serves as a nutritious breakfast, a pre-workout energy boost, or a satisfying afternoon snack. With endless possibilities for mix-ins—from chocolate chips to dried fruits—these bars cater to everyone’s cravings. Best of all, there’s no baking required! Just mix, press, chill, and enjoy your homemade delight.
Ingredients
- 2 cups old-fashioned rolled oats
- 1/2 cup nut butter (peanut butter, almond butter, or cashew butter)
- 1/3 cup honey (or maple syrup/agave)
- 1/2 cup mix-ins (chocolate chips, dried fruit, seeds, or nuts)
- 1 teaspoon vanilla extract (optional)
- Pinch of salt
Instructions
- Prepare an 8×8-inch baking dish by lining it with parchment paper.
- In a mixing bowl, combine the rolled oats and your chosen mix-ins.
- In a small saucepan over low heat, melt the nut butter and honey until smooth. Add vanilla extract and salt if using.
- Pour the warm mixture over the dry ingredients and stir until everything is well-coated.
- Transfer to the prepared dish and press down firmly with a spatula.
- Chill in the refrigerator for at least 2 hours until set.
- Once firm, lift out using parchment paper and cut into bars.
- Prep Time: 10 minutes
- Cook Time: None
- Category: Dessert
- Method: No Bake
- Cuisine: American
Nutrition
- Serving Size: 1 serving
- Calories: 150
- Sugar: 7g
- Sodium: 40mg
- Fat: 8g
- Saturated Fat: 1g
- Unsaturated Fat: 7g
- Trans Fat: 0g
- Carbohydrates: 16g
- Fiber: 2g
- Protein: 4g
- Cholesterol: 0mg