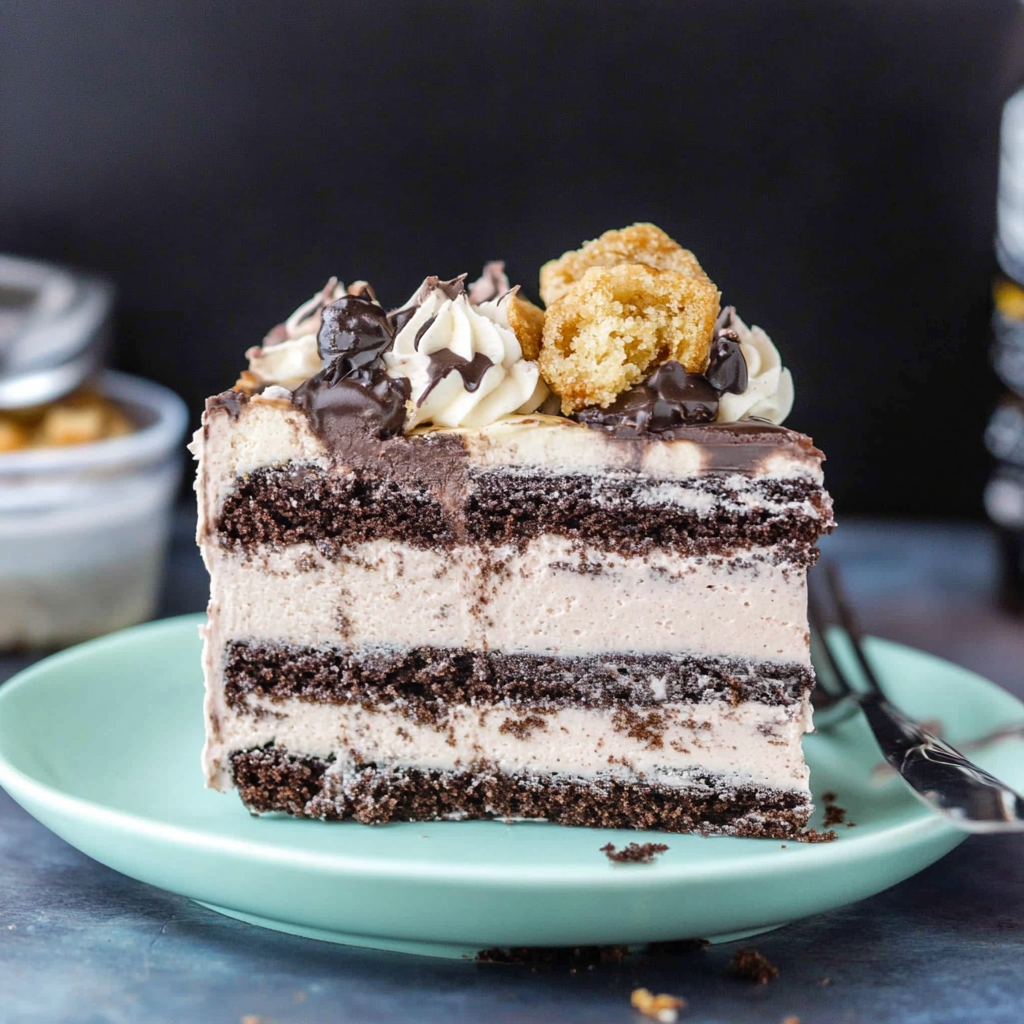
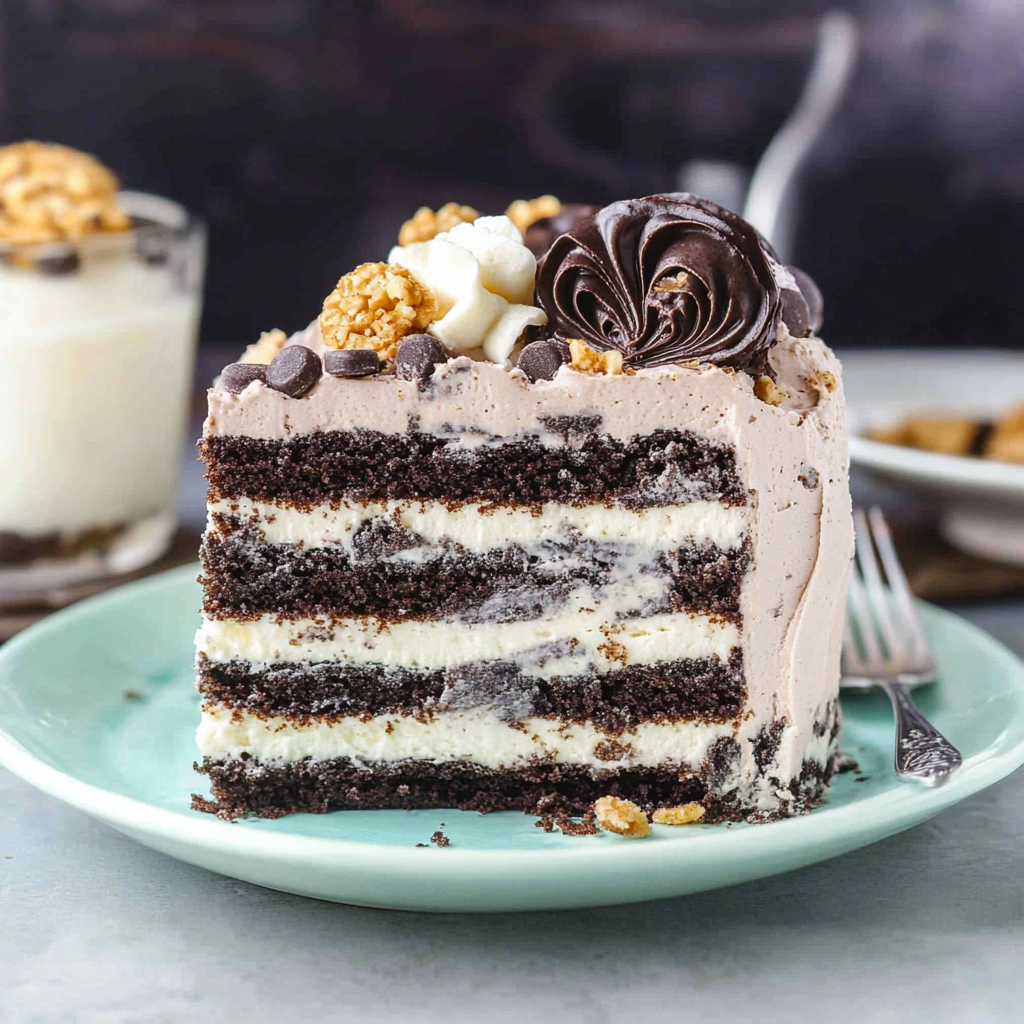
With its irresistible layers of brownies, chocolate chip cookies, and Oreos, the Slutty Brookie Icebox Cake is the ultimate indulgence for chocolate lovers. This no-bake dessert is perfect for gatherings, celebrations, or simply satisfying your sweet tooth. With a combination of textures and flavors, this cake stands out as a crowd-pleaser that’s surprisingly easy to prepare!
Why You’ll Love This Recipe
- Decadent Layers: Enjoy rich layers of brownies, cookies, and mousse that create a delightful experience in every bite.
- No-Bake Delight: Skip the oven! This icebox cake requires no baking, making it an effortless treat to whip up.
- Versatile Serving: Perfect for parties, potlucks, or just a cozy night in; this dessert fits any occasion.
- Easy to Customize: Feel free to swap ingredients based on your preferences or pantry staples—get creative!
- Make Ahead Convenience: Prepare this cake in advance and let it chill overnight for the best flavor and texture.
Tools and Preparation
Before diving into making the Slutty Brookie Icebox Cake, gather your tools. Having everything ready will streamline the process.
Essential Tools and Equipment
- Mixing bowls
- Electric mixer
- Rubber spatula
- 9×13-inch baking dish
- Measuring cups and spoons
Importance of Each Tool
- Electric mixer: Makes whipping cream and mixing batter quick and effortless.
- Measuring cups and spoons: Ensures precise ingredient measurements for consistent results.
- Rubber spatula: Perfect for folding ingredients gently without deflating whipped cream.
Ingredients
For the Cake Layers
- 2 family sized package (20 oz) Oreos
- 6-8 Soft baked chocolate chip cookies, chopped
- 4-5 fudgy brownies or 1 8-inch square pan, prepared and cooled
For the Chocolate Mousse Layer
- 1 cup milk
- 1 tablespoon cold water
- 1 teaspoon vegan gelatin
- 1 ½ cups heavy whipping cream
- ¾ cup brownie mix
- 1 cup chopped brownies
For the Cookie Mousse Layer
- 1 tablespoon cold water
- 1 teaspoon vegan gelatin
- 1 ½ cups heavy whipping cream
- ½ cup powdered sugar
- 2 tablespoons all-purpose flour
- 3 tablespoons light brown sugar
- 2 teaspoons vanilla extract
For Garnish
- 4 soft-baked chocolate chip cookies
- 1 tablespoon cold water
- 1 teaspoon vegan gelatin
- 1 ¾ cups heavy whipping cream
- ½ cup powdered sugar
- 1 teaspoon vanilla extract
- 10 Oreos, crushed
How to Make Slutty Brookie Icebox Cake
Step 1: Prepare Your Baking Dish
Start by greasing your 9×13-inch baking dish. This will help prevent sticking when you layer your ingredients.
Step 2: Layer the Oreos
- Begin by placing one package of Oreos at the bottom of the prepared dish to create a solid base.
Step 3: Make Brownie Layer
- In a large mixing bowl, mix together chopped fudgy brownies with brownie mix.
- Whip one cup of heavy cream until stiff peaks form. Gently fold in brownie mixture until combined.
- Spread evenly over Oreo layer.
Step 4: Add Cookie Layer
- In another bowl, whisk together cold water and vegan gelatin. Let it sit for a few minutes until it thickens.
- In a separate bowl, whip one cup of heavy cream with powdered sugar until fluffy. Fold in cookie mix gently.
- Spread this mixture over the brownie layer.
Step 5: Final Oreo Layer
- Crush remaining Oreos to sprinkle on top as garnish. Finish with hot fudge drizzle if desired for extra indulgence!
Step 6: Chill and Serve
Refrigerate the cake for at least five hours or overnight before serving. Enjoy this delicious Slutty Brookie Icebox Cake with friends or family!
How to Serve Slutty Brookie Icebox Cake
This Slutty Brookie Icebox Cake is a showstopper that deserves to be served with flair. Whether you’re hosting a party or enjoying a quiet evening, these serving suggestions will enhance your dessert experience.
Individual Slices
- Serve each slice on a small dessert plate for a classic presentation. Drizzle hot fudge on top for an extra treat.
With Fresh Berries
- Pair your cake with fresh strawberries, raspberries, or blueberries. Their tartness balances the sweetness of the cake beautifully.
A Scoop of Ice Cream
- Add a scoop of vanilla or chocolate ice cream on the side. The creaminess complements the rich layers of the icebox cake perfectly.
Whipped Cream Topping
- Top each slice with a dollop of whipped cream. This adds lightness and enhances the indulgent flavors.
Chocolate Shavings
- Garnish with chocolate shavings or curls for an elegant touch. It adds both visual appeal and extra chocolate flavor.
Hot Fudge Sauce
- Serve warm hot fudge sauce on the side for drizzling. Guests can add their desired amount, making it interactive and fun!
How to Perfect Slutty Brookie Icebox Cake
To achieve the ultimate Slutty Brookie Icebox Cake, consider these helpful tips that ensure every bite is delicious.
- Chill Time Matters: Allow the cake to chill in the fridge for at least 4 hours. This helps the layers set and meld together beautifully.
- Use Fresh Ingredients: Ensure that all ingredients, especially dairy and baked goods, are fresh for the best flavor and texture.
- Layer Evenly: Spread each layer evenly to ensure consistent flavor in every bite. This makes slicing easier too!
- Experiment with Textures: Consider adding different layers of textures like crushed nuts or additional cookie crumbles for added crunch.
- Presentation Counts: Use a nice serving platter to elevate your dessert’s appearance. A beautiful presentation will impress your guests!
Best Side Dishes for Slutty Brookie Icebox Cake
Pairing side dishes with your Slutty Brookie Icebox Cake can create a delightful dessert spread. Here are some great options to consider.
- Fruit Salad: A refreshing mix of seasonal fruits offers a sweet and light counterbalance to the richness of the cake.
- Cheesecake Bites: Small bites of cheesecake provide a creamy contrast that complements the chocolate flavors in the cake.
- Chocolate-Covered Strawberries: These treats add elegance and extra chocolate goodness that pairs perfectly with the brookie cake.
- Mini Cupcakes: Offer various flavors like vanilla or red velvet to surprise guests with different sweet options alongside their cake.
- Pineapple Upside Down Cake: The tangy pineapple contrasts nicely with the sweet brookie layers, providing a lovely variety in flavor profiles.
- Vanilla Pudding Cups: Creamy pudding cups add another layer of sweetness without overpowering the main dessert.
- Coconut Macaroons: These chewy treats contribute texture and subtle coconut flavor, enhancing your dessert table’s offerings.
- Ice Cream Sundae Bar: Set up a DIY sundae bar where guests can create their own sundaes using ice cream and toppings, including leftovers from your brookie cake!
Common Mistakes to Avoid
When making the Slutty Brookie Icebox Cake, it’s easy to make some common mistakes that can affect the outcome. Here are a few tips to help you avoid them.
- Incorrectly measuring ingredients: Using too much or too little of an ingredient can change the texture and flavor. Always use precise measurements for best results.
- Not letting brownies cool properly: If the brownies are warm when assembling, they can melt other layers. Allow them to cool completely before using.
- Skipping the chilling time: The cake needs time in the refrigerator to set properly. Don’t rush this step; aim for at least 5 hours for optimal taste and texture.
- Using low-quality chocolate: The quality of your chocolate will greatly impact the flavor of your cake. Opt for high-quality chocolate chips and brownie mix for richer taste.
- Overmixing the cream: When whipping cream, be careful not to overmix as this can turn it into butter. Whip just until soft peaks form.
Storage & Reheating Instructions
Refrigerator Storage
- Store leftover cake in an airtight container.
- It will last up to 5 days in the refrigerator.
Freezing Slutty Brookie Icebox Cake
- For longer storage, wrap slices tightly in plastic wrap followed by aluminum foil.
- You can freeze it for up to 3 months.
Reheating Slutty Brookie Icebox Cake
- Oven: Preheat your oven to 350°F (175°C) and warm individual slices for about 10 minutes.
- Microwave: Heat a slice on medium power for about 30 seconds or until warm.
- Stovetop: Place a slice in a pan over low heat, covering with a lid until warmed through.
Frequently Asked Questions
Here are some common questions about making the Slutty Brookie Icebox Cake.
How do I customize my Slutty Brookie Icebox Cake?
You can customize this cake by adding different types of cookies or using flavored brownie mixes. Experiment with toppings like crushed nuts or whipped cream!
Can I make Slutty Brookie Icebox Cake ahead of time?
Absolutely! In fact, making it a day in advance allows all flavors to meld perfectly. Just ensure it’s stored properly in the refrigerator.
What if I don’t have vegan gelatin?
You can substitute agar-agar or pectin if vegan gelatin is unavailable. Follow package instructions for proper usage.
How should I serve Slutty Brookie Icebox Cake?
Slice it into squares and serve chilled. Drizzling hot fudge on top enhances its flavor wonderfully!
Final Thoughts
The Slutty Brookie Icebox Cake is an indulgent treat that brings together layers of deliciousness in every bite. Its rich flavors and creamy textures make it perfect for any occasion. Feel free to customize it with your favorite cookies or toppings, ensuring each experience is unique. Give it a try; you won’t regret it!
Slutty Brookie Icebox Cake
- Total Time: 0 hours
- Yield: Serves approximately 12 slices 1x
Description
Indulge in the Slutty Brookie Icebox Cake, a delightful no-bake dessert that combines layers of fudgy brownies, soft-baked chocolate chip cookies, and crunchy Oreos. This decadent treat is perfect for any occasion, from gatherings to cozy nights at home. With its rich flavors and creamy mousse layers, this cake is sure to impress family and friends while satisfying your sweet tooth. Plus, it’s incredibly simple to prepare—no baking required! Just layer the ingredients and let it chill for a few hours for the ultimate dessert experience.
Ingredients
- 2 family-sized packages of Oreos
- 6–8 soft-baked chocolate chip cookies, chopped
- 4–5 fudgy brownies (or one 8-inch square pan)
- 1 cup milk
- 1 tablespoon cold water
- 1 teaspoon vegan gelatin
- 1 ½ cups heavy whipping cream (for each mousse layer)
- ¾ cup brownie mix
- ½ cup powdered sugar
- 2 tablespoons all-purpose flour
- 3 tablespoons light brown sugar
- 2 teaspoons vanilla extract
- 4 soft-baked chocolate chip cookies (for garnish)
- 1 tablespoon cold water (for garnish)
- 1 teaspoon vegan gelatin (for garnish)
- 1 ¾ cups heavy whipping cream (for garnish)
- ½ cup powdered sugar (for garnish)
- 1 teaspoon vanilla extract (for garnish)
- 10 Oreos, crushed (for garnish)
Instructions
- Grease a 9×13-inch baking dish.
- Layer one package of Oreos at the bottom.
- Mix chopped brownies with brownie mix; whip one cup of heavy cream and fold it into the brownie mixture. Spread over Oreos.
- Prepare cookie mousse by mixing vegan gelatin with cold water, then whip cream with powdered sugar. Fold in cookie mix and spread over the brownie layer.
- Top with crushed Oreos as garnish and optionally drizzle with hot fudge.
- Chill in the refrigerator for at least five hours or overnight before serving.
- Prep Time: 30 minutes
- Cook Time: No cooking required
- Category: Dessert
- Method: No-Bake
- Cuisine: American
Nutrition
- Serving Size: 1 serving
- Calories: 360
- Sugar: 28g
- Sodium: 150mg
- Fat: 22g
- Saturated Fat: 12g
- Unsaturated Fat: 8g
- Trans Fat: 0g
- Carbohydrates: 38g
- Fiber: 2g
- Protein: 4g
- Cholesterol: 45mg